Welcome to ADX SVC! This guide provides an in-depth look at the features, functionality and workflow of SVC. To quickly learn how to use and work with ADX SVC, please consult the Quick Start section here.
You can click on a specific part of the interface below to directly access the corresponding section, navigate to a specific topic using the table of contents, or proceed step-by-step by going through the entire document.
Click here to access a printable .pdf version of this User Guide.
Direct any questions or issues you may encounter with the use or installation of ADX SVC to support@audionamix.com.
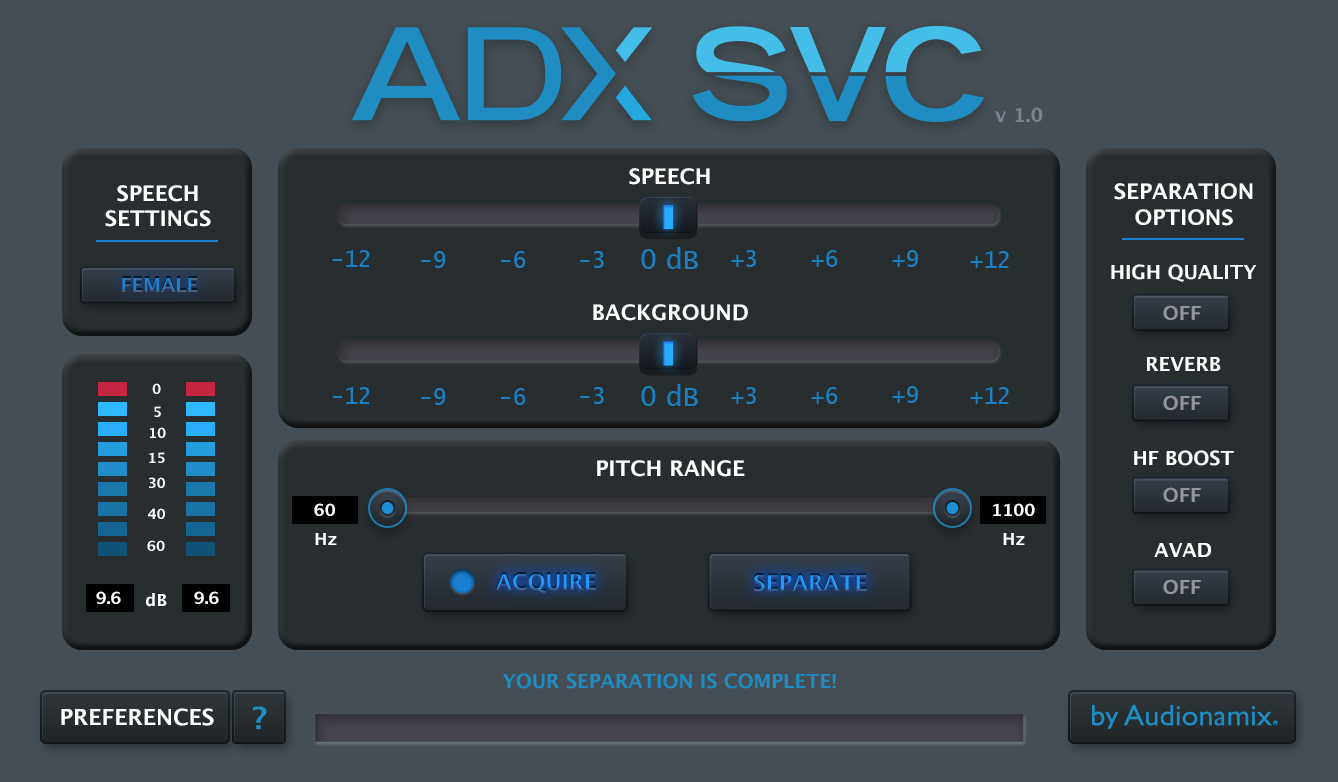
The ADX Speech Volume Control (SVC) plug-in allows you independent volume level control over both speech and background elements within a mono or stereo mix. Lower the level of background noise within troublesome production audio, or easily boost dialogue levels without requiring access to stems or the full multitrack session.
SVC uses a speech-optimized version of ADX VEX, a cloud-based, multi-algorithmic voice extraction technology that automatically separates audio from within your favorite DAW.
SVC is very easy to use. Its elegant interface and simple controls provide access to advanced separation algorithms and standard volume sliders. The integrated Consonants Detection algorithm automatically identifies and separates difficult noisy consonants. Pitch Range presets can be used to easily target typical male, female and child speech frequency ranges.
ADX SVC 1.0 is available in VST, AU (Audio Units) and AAX Native (64-bit and 32-bit formats) for Mac OS X and Windows.
SVC relies on ADX cloud-based separation algorithms to manipulate the voice component of a mix independent of the rest of the background. Because the separation processing is done in the cloud, a high-speed Internet connection is required to use SVC.
We test ADX SVC regularly with the following DAWs:
SVC is not compatible with with the following DAWs:


Although ADX SVC may work with other DAWs, only those that are regularly tested are officially supported. For questions, please contact our support team at support@audionamix.com.
The installation process depends on your operating system.
For Mac OS X, open the SVC .dmg file.
Make sure that no DAWs are running and simply drag and drop the plug-in icon into the folder alias.

You can also manually copy and paste SVC into the correct location, depending on the version you’re installing:
- AAX plug-in: /Library/Application Support/Avid/Audio/Plug-Ins/
- VST plug-in: /Library/Audio/Plug-Ins/VST
- AU plug-in: /Library/Audio/Plug-Ins/Components
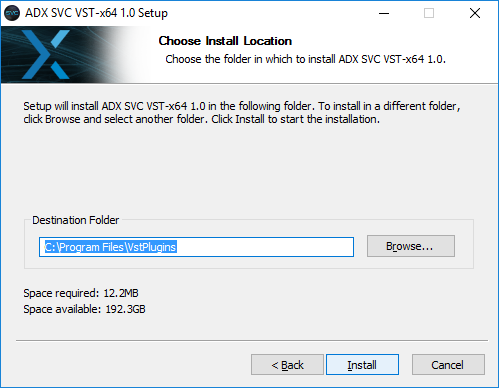
For Windows, first select between 32-bit and 64-bit versions of SVC.We advise you to match the host architecture. For example, if you’re using a 32-bit VST host, you need to install the 32-bit ADX SVC edition, even if your Windows has a 64-bit architecture. Once you open the corresponding folder, double-click on the Setup.exe and follow the installation steps.
By default, ADX SVC is installed in these locations on Windows systems: - The VST 32-bit version: C:\Program Files (x86)\VSTPlugins - The VST 64-bit version: C:\Program Files\VSTPlugins - Both AAX version: C:\Program Files\Common Files\Avid\Audio\Plug-Ins You can also point the installer to another location and change the plug-in path from the host DAW to match.
The first time you insert and open the SVC plug-in, you will have to authorize it. To do so, click the Preferences button and enter the Username and API key that you received when you purchased SVC. This information can also be found on your account page.
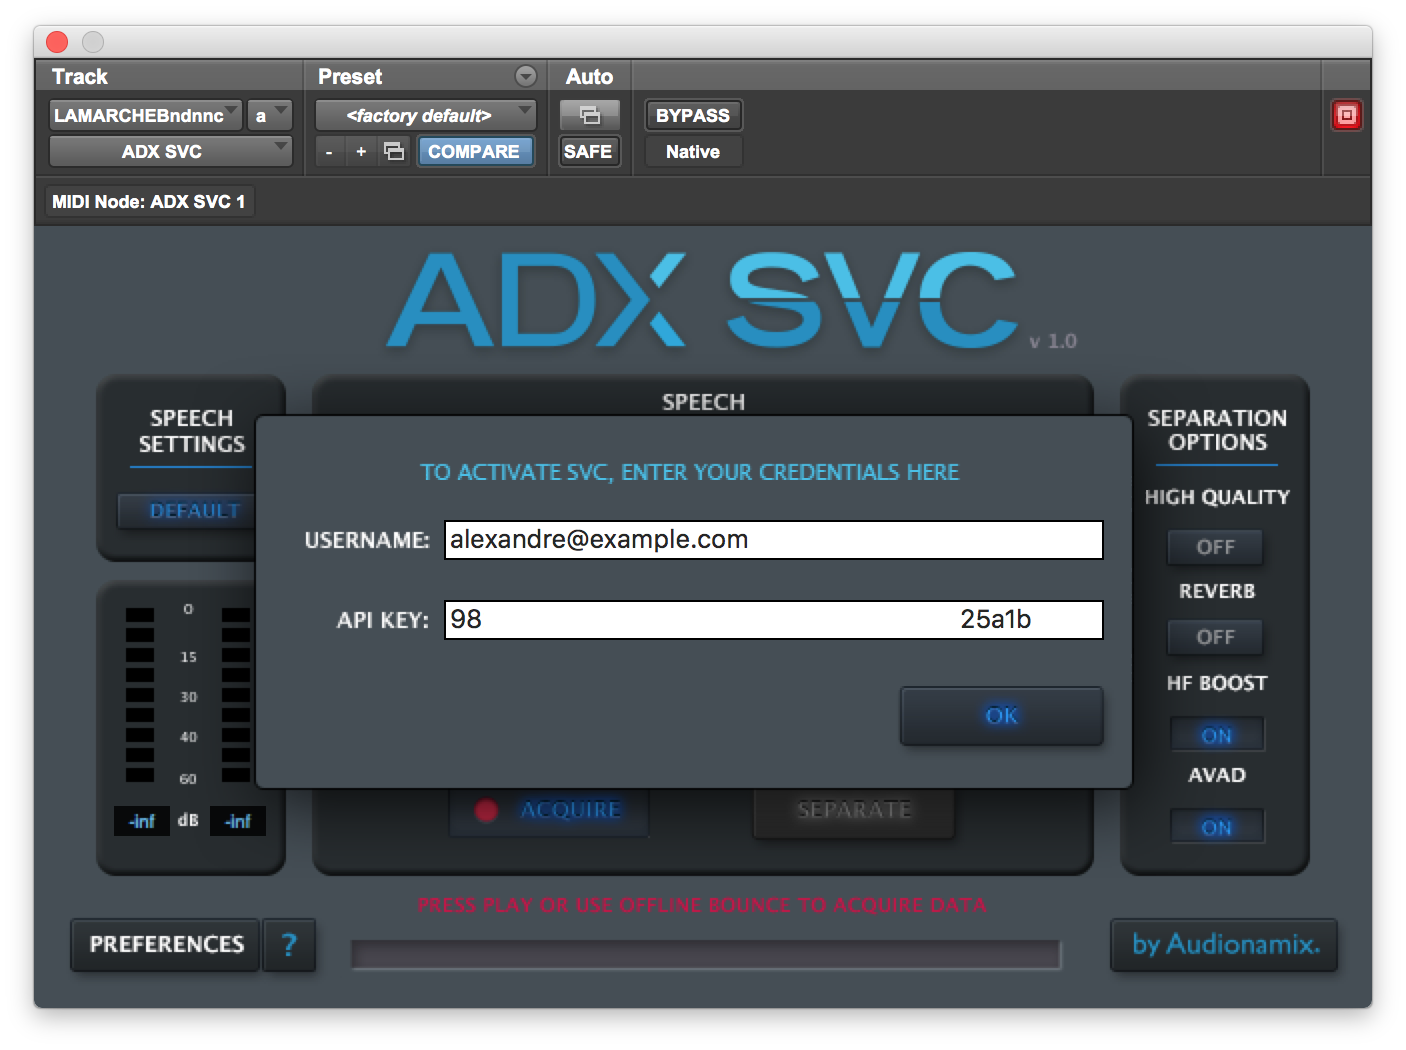
Please note that SVC requires an active Internet connection in order to connect to the cloud-based separation algorithms. Once your system is connected to the internet, follow these steps to begin working with SVC:
NOTE: After a separation is complete, acquired audio will output from within the SVC plug-in. Editing or moving the original audio clip on your timeline will therefore affect your results. For this reason we recommend editing audio prior to applying SVC.
In order to allow you to adjust and control the volume of a voice within a mix, ADX SVC first needs to isolate the speech.
This is why acquiring the audio you want to separate is the first step in ADX SVC.

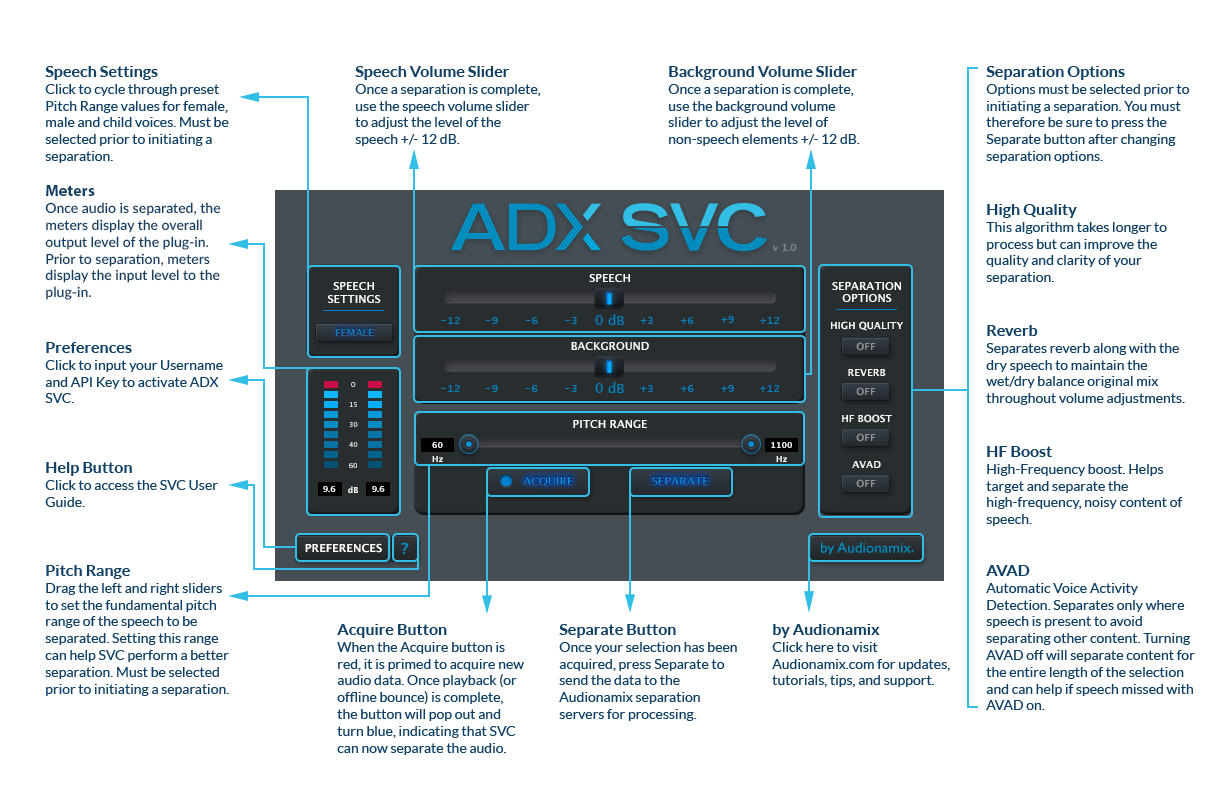
After selecting the audio you wish to process, ensure that the Acquire button is pressed in and the light is red. This indicates that SVC is ready to acquire audio data. Start playback or initiate an Offline Bounce to send the selected audio into SVC. When you stop playback or the Offline Bounce process completes, the Acquire button will pop out and the light will turn blue. The plug-in should now read ‘Data Acquired, Choose Separation Options and Press Separate…’
As the plug-in message indicates, before running the separation, you can change the Separation Options and indicate the Speech Settings or specific Pitch Range in order to improve the separation.

After data is acquired and the options set-up, press the Separate button to send the data to the ADX servers for processing.
After the separation process is complete, use the Speech Volume Control Slider to raise and lower the level of the main speech within the mix +/- 12dB.
Use the Background Volume Control Slider to raise or lower the level of all non-speech content +/- 12dB.

To enter a specific level, Double-click on a Volume Slider.
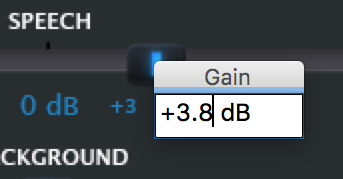
To return a Slider to 0, Option-click or Right-click it.
Speech and Background volume sliders can also be automated.

SVC will separate the voice in the selected audio based on its best calculation of the pitch. You can assist the plug-in in this regard by entering the known or estimated pitch range of the speech you would like to target. This will tell SVC to only look for voices whose fundamental frequency is between the lowest and the highest pitch you’ve selected.
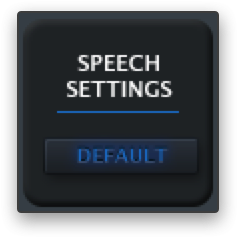
The Speech Settings can help you to set the Pitch Range.
Settings are based on typical adult male, female, or child speech frequency ranges . Click on the button to switch from one setting to another. You will see the values adjust on the Pitch Range slider, and can then customize the range from there.
These options can help improve the results of your separation.
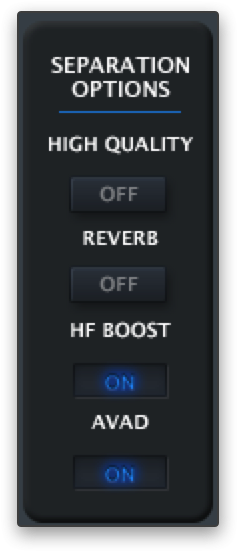
To use an alternative algorithm, turn on the High Quality option. This algorithm takes longer to process, but can improve the quality and clarity of your separation.
To have SVC include the reverb or room tone of the voice in the separation and maintain the wet/dry balance as you adjust the speech volume, turn on the Reverb option.
Turn On HF Boost to have more high frequencies included in the separated speech.
AVAD stands for Automatic Voice Activity Detection. This is on by default and helps in precisely targeting speech content within your audio file.
With AVAD off, ADX algorithms extract speech content for the entire duration of the acquired selection. This can be useful when the algorithm misses segments of the speech. In return, turning off the AVAD may bring back unwanted elements in the extracted file when no speech is actually present.
Unlike ADX VVC, ADX SVC only extracts Speech. This means that you cannot adjust the volume of a vocal melody line, even when AVAD is turned Off.
NOTE: results do not adjust in real time. In order to hear the effect of adjusting these parameters, you have to run the separation again to hear the new result.
There are four settings that can be automated in the SVC plug-in:
Please consult your DAW’s help documentation for specific instructions on automating plug-in parameters.
You can quickly acquire the audio you want to separate by Exporting the Audio Mixdown from the File Menu after setting the left and right locators to the desired audio selection.
ADX SVC has been designed to be used as a pre-fader plug-in.
Using ADX SVC on a post-fader insert slot is not recommended and will lead to unexpected results.
You can quickly acquire the audio you want to separate by using the Export Audio function from the File menu.
If you are using ADX SVC in Live’s Arrangement View, you can acquire, separate and control speech volume level as described in this user guide. However, if you wish to use ADX SVC in the Session View, please keep the following points in mind:
When the separation is complete, ADX SVC is playing the extracted speech part at the exact same time as your original song, and that is what permits you to adjust the level of the speech and background volume. If you cannot ensure that the two parts are played at the same time, SVC won’t work as expected. The clips in Session View represent small loops within the linear running time of the Arrangement in Live. It is from this Arrangement time that ADX SVC derives its timing information. For this reason, you’re recommended to use SVC only when working in Live’s Arrangement View.
You can acquire the audio you want to separate by clicking on Export Mixdown from the Song Menu.
When working on a Project, ADX SVC has to be put on a master insert slot.
You can quickly acquire the audio you want to separate using the Bounce to Disk command under the File menu.
For additional help with ADX SVC, please visit our web site at www.audionamix.com/support where you will find Pro Tips, Tutorials, and Frequently Asked Questions, or contact our technical support department at support@audionamix.com .
Our support team offers significant media industry experience, expertise and personal dedication to help you resolve technical issues and stay productive.
Thank you for using ADX SVC.